Wednesday, June 20, 2012

Peanut Buttery Brownie Torte


Peanut Buttery Brownie Torte,brownie with peanut butter cream cheese frosting

This is by no means a healthy dessert, but I’m taking the opportunity to add a little bit of goodness to it anyway (with the addition of banana and ground flaxseed).  The banana enables less oil to be used, keeps the brownie moist, and provides just a hint of banana.

You may notice from the recipe that I don’t use a lot of sugar in the frosting as I’m not a fan of super sweet frosting.  Add more sugar to suit your own taste. 


Peanut Buttery Brownie Torte

1 (18.3 oz) package brownie mix
2 eggs
1/4 cup water
1/3 cup oil
1 medium banana, thoroughly mashed (about 1/3 cup)
2 tbsp. ground flaxseed
4 oz. cream cheese (low fat or regular), room temperature
1/2 cup powdered sugar
1/3 cup creamy peanut butter
8 peanut butter cup candies (miniature size), chopped
Additional oil for prepping cake pans

Preheat oven to 350 degrees F.

Oil bottom and sides of three 6-inch cake pans.  Line bottom of pans with parchment paper.  Brush top of parchment with additional oil.

Combine brownie mix, water, oil, eggs, banana, and flaxseed.  Whisk until well blended, about 50 strokes.  Divide batter equally into the three cake pans.  Bake for 25 minutes or until toothpick comes out clean when inserted.  Allow to cool.

Beat cream cheese, powdered sugar and peanut butter until smooth and creamy.  Remove brownies from pans and peel off parchment paper.  Stack cake layers, spreading frosting and sprinkling peanut butter cups on top of each layer.


Print Friendly and PDF
Follow FoodforFinicky on Twitter

Thursday, June 7, 2012

Mini Pork Aracini, Asian Style


Mini Pork Aracini,Asian Style


Aracini is an Italian fried rice ball often stuffed with cheese, with or without meat.  I have put my own little twist and created an Asian version, filled with pork meatballs and no cheese.   To keep it on the lighter side, they are baked, not fried.  

Aborio rice is commonly used to make aracini, but I find that regular white grain rice works well.  All it needs is a little bit of manipulation to bring out the starch to help with binding.  My technique is revealed in below.

I decided to make mini aracini mainly because it is easier for little children to handle and eat.  I have made 2" - 2.5" inch wide ones in the past that turned out really nice.  Just a word of caution, since there is no cheese to bind the rice layer, it might have a tendency to break apart when bitten into if the layer is too thick.  Don't go too thick on the rice.

We enjoy the aracinis as is, but if you must have sauce, a tasty ginger dipping sauce recipe is included below.   Since the ginger sauce might be a little on the exotic side for a lot of children, the sweeter duck sauce is a good alternative.  The little ones I feed prefer the aracini without  sauce.


Mini Pork Aracini, Asian Style

8 oz. ground pork
1/3 cup minced button mushrooms
1 tbsp. flaxseed meal
1/4 cup chopped scallion
1 tsp. minced garlic
1 tsp. minced ginger
1/4 tsp. pepper
1/4 tsp. salt 
2 tsp. soy sauce
1 cup uncooked rice
2 cups water
2 eggs
1cup panko crumbs

Boil water in a heavy bottom small saucepan.  Add rice and lower heat to medium low.  Give rice a stir for about 10 seconds.  Cover and simmer for 20 minutes.  Turn off heat and allow rice to sit for 5 minutes.  To bring out the starchiness, use a rubber spatula to stir rice and gently press  as you stir until it becomes sticky, should take about 1 minute.  Spread on a cookie sheet to cool.

Preheat oven to 375 degrees F.  Spray cookie sheet with cooking spray.  Add panko crumbs and bake for 3-4 minutes until panko turns light brown.   Remove from oven and stir crumbs around using a spatula.  Set aside.

For the pork filling, place first nine ingredients in a medium bowl.  Add one egg, slightly beaten.  Thoroughly combine all ingredients. 

Slightly beat the second egg and add to cooled rice.  Thoroughly blend.  Scoop about a rounded tablespoon of rice into your palm and form a ball.  Hollow out the ball using a finger to create a well.  To prevent sticking, wet hands with water before handling rice.  Fill well with about 1 teaspoon of the pork filling.  Pack the rice around the pork filling.  Set aside.  Repeat steps for the remainder rice balls.

Roll each aracini in panko crumbs.  Place on a greased cookie sheet.  Coat aracinis with a generous layer of cooking spray.  Bake in a preheated 375 degrees oven for 25 minutes or until pork is  no longer pink when cut into. Makes about 24, approx. 1.5” to 1.75” arancinis.

Ginger Dipping Sauce

1/4 cup soy sauce
3 tbsp. rice wine vinegar
2 tsp. grated ginger
1 tsp. sesame oil
2 tbsp. finely chopped scallion, greens only
1 tbsp. super fine sugar

In a small bowl, combine all ingredients and stir well until sugar is well incorporated.  Allow to rest 15 – 20 minutes before serving.


Print Friendly and PDF
Follow FoodforFinicky on Twitter

Tuesday, May 29, 2012

Banana Tempura


banana tempura, fried bananas

It is amazing how sweet banana gets when it is heated.  For this reason, it makes a terrific dessert.

Tempura dishes are traditionally deep fried, but I make this by using the shallow frying method.  I have to admit, I’m not sure if my method really shaves off the calories, but it makes me feel a little better about frying. If you choose to deep fry, set the oil temperature to 175 degrees F and fry bananas about 1 minute or until the batter is golden and crispy.

Whether shallow frying or deep frying, there will be a bit of oil splatter.  I find that using a saucepan or a skillet with deep sides helps reduce the mess.  Don’t let the splattering deter you.  It will be worth the effort!


Banana Tempura

1/2 cup flour
1/4 cup + 2 tbsp. cornstarch
2 tsp. sugar
1/8 tsp. cinnamon
1/2 cup chilled club soda
3 large bananas
canola oil

Whisk the first five ingredients just until smooth, don’t over mix.  Set aside.

Peel and slice bananas to 1/4 - 1/3 inch thick.  Heat a medium size skillet with deep sides on medium to medium high heat.  Add 1/8 inch of oil to skillet. 

Working in small batches, dip a few banana slices in batter.  Add to hot oil, one at a time.  Be careful not to let the batter touch as the bananas will stick to each other.  Cook until the bottom is golden brown, about 2 minutes.  Flip over and cook until the second side is golden and crispy, about 1 minute.  

Transfer to paper towel line plate and gently pat dry.  Transfer again to a serving dish.  Do not let the bananas sit on the paper towel as they may stick.  Serve plain or with a sprinkle of powdered sugar. 


Print Friendly and PDF
Follow FoodforFinicky on Twitter

Tuesday, May 15, 2012

Skillet Tricolor Pearl Couscous and Ham

one pot couscous meal, Tricolor Pearl Couscous and Ham

Tricolor Pearl Coucous is larger than regular couscous and is such a pretty pasta.  It makes a perfect base for a deliciously colorful dish. I tested this recipe out this week.  I am happy to report that it got six out of seven thumbs up from a group of two teenagers and five toddlers and preschoolers.

Hope you’ll give it a try!

Tricolor Pearl Couscous


Skillet Tricolor Pearl Couscous and Ham

1 cup Tricolor Pearl Couscous
2.5 cups water, divided
1/4 lb. thick sliced deli ham                         
2 tbsp. finely chopped chives
1/2 cup finely diced carrots  
1/2 cup minced onion
1 tsp. minced garlic
1/4 cup grated Parmesan cheese
1 tbsp. extra virgin olive oil 
1/2 tsp. salt  
1/4 tsp. pepper  

Prep the carrots first as it requires the longest cooking time.  Bring 1 cup of water to a boil in a covered medium skillet.  Add finely diced carrots and boil gently for about 8 minutes. Remove carrots from skillet and discard any liquid.

While carrots are cooking, finely mince the onion, garlic and chop the chives.  Finely dice the ham.  

Reheat skillet on medium heat.  Add olive oil to pan and stir in onion and carrots.  Cook for 5 minutes, stirring occasionally.  Add couscous and garlic, stirring frequently for 3 minutes.  Add 1.5 cup water, salt, and pepper.  Allow to come to a boil.  Cover, and reduce heat to a simmer for 5 minutes.  Stir in chives and ham.  Cover and continue to simmer until couscous is soft and all the water has been absorbed, about 5 additional minutes.  Remove from heat.  Stir in cheese.  Serve.

Print Friendly and PDF
Follow FoodforFinicky on Twitter

Monday, April 30, 2012

Mashed Potato Sticks


Tastes like French fries, Mashed Potato Sticks are baked until crispy and golden brown.

I don’t know about anybody else, but my leftover mashed potato usually ends up in the trash after it sits in the fridge for a few days.  Immediately throwing it out would save time and effort, but guilt often gets the best of me.  Storing the potato first (prior to it meeting its destiny in the bottom of my trash bin) makes me feel as if I put in genuine effort to avoid wastefulness.

Well, waste no more! I finally discovered a simple, perfect solution to leftover mashed potato—turn it into potato sticks.  They are crispy on the outside and soft on the inside, very much like French fries.  Best served hot straight from the oven.

And, do kids like them? Well…they taste a lot like French fries…need I say more?


Mashed Potato Sticks
I recommend using creamy mashed potato, not smashed potato for this recipe

for every 1 cup of prepared mashed potato add the following
1/8 tsp. salt
1/8 tsp. pepper
1/8 tsp. garlic powder
1 tbsp. cornstarch
2 tsp. golden flaxseed  


Preheat oven to 400 degrees F.

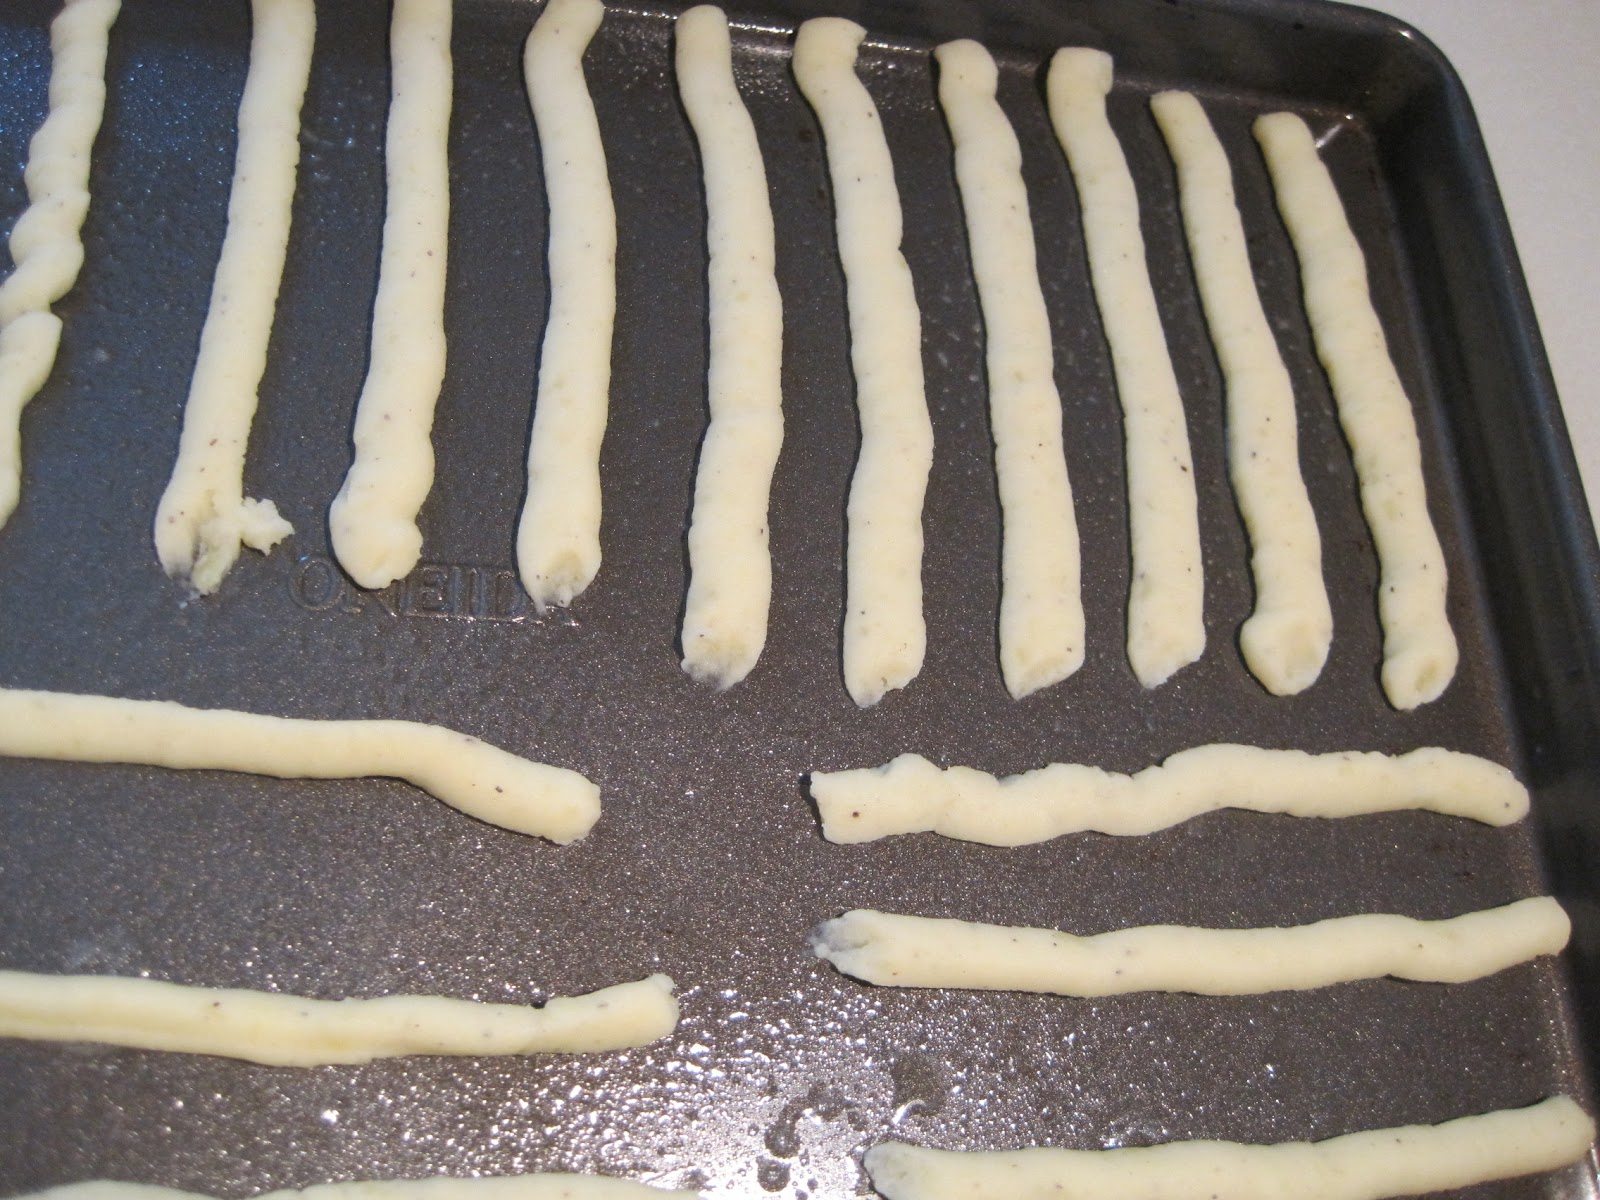
Blend all ingredients thoroughly.  Spoon into a plastic bag and twist opening closed.  Cut a 1/2" to 3/4" slit in one corner of bag.  Pipe strips of potato (about 6 – 8 inches long) onto a greased cookie sheet.  Cover potato strips with a light coat of cooking spray.  Bake for 15 minutes or until bottom of potato is golden brown.  Turn potato sticks over and bake an additional 5-7 minutes.  Serve hot.

Note:  Wider strips of potato require longer cooking time.
Refrigerated potato strips are best served reheated in the oven for a couple minutes.


Print Friendly and PDF
Follow FoodforFinicky on Twitter

Tuesday, April 24, 2012

Funky Monkey (Peanut Butter and Fruit Sandwich)


Funky Monkey, a healthy grilled peanut butter and fruit sandwich.  Peanut butter and banana, peanut butter and strawberries sandwich.

I originally designed this sandwich for toddlers and preschoolers; the bread was pressed flat and fruit cut thin in order for little mouths to bite into it.  For older children and adults like myself who enjoy a peanut butter sandwich every now and then, generous use of ingredients is encouraged—slather on thicker layers, go bigger on the fruit slices, and no need to flatten the bread.  It will only make the sandwich fuller and more decadent!    

Made with whole wheat bread, sprinkled with flaxseed meal, and drizzled with honey, this is a well rounded, healthy sandwich for lunch or dinner.  Finished with a toast to the outside and layered with peanut butter and fruit on the inside, this sandwich is a nice balance of warm versus cold and sweet versus salty.

The recipe below is for the kid version of Funky Monkey (seen in the foreground of the picture); just go bigger and taller for the adult version (in the background).


Funky Monkey (Grilled Peanut Butter & Fruit Sandwich)

3 slices of whole wheat or high fiber bread
1 tbsp. peanut butter
1 tbsp. light cream cheese  
1 tsp. honey
1/4 - 1/2 tsp. flaxseed meal
1 small banana, thinly sliced
2 medium strawberries, thinly sliced
2 tsp. butter or margarine, melted

Stack the slices of bread in between two plates.  Press firmly down on plates and hold for about 30 seconds to flatten bread.  Gently separate bread layers.

Heat a large skillet on medium to medium high.  Brush one side of each bread slices with butter.  Place, butter-side-down in skillet and grill till golden brown.  Remove 2 slices and place on a plate (these will be the outer bread layers).  Butter the other side of the remaining slice and grill until golden brown (this will be the middle layer of the sandwich).  Transfer to plate.

To assemble:  Using one of the outer bread layers, spread peanut butter on the grilled side.  Sprinkle with flaxseed  and add bananas. 

Place the middle bread layer (grilled on both sides) over banana.  Spread cream cheese on top, add strawberries, drizzle with honey, and cover with the last piece of bread, grilled-side-down.

Reheat skillet, butter one side of the sandwich, and grill until golden brown.  Butter the other side, flip over, and grill.  Enjoy!


Print Friendly and PDF
Follow FoodforFinicky on Twitter

Thursday, April 12, 2012

Shaped Pork Egg Rolls

pork egg rolls, baked and cut into shapes with dipping sauce

These egg rolls are unique in that they are not formed into rolls, but cut into shapes. If you want a child to try a food, cutting it into shapes perks their curiosity.  These are best eaten, hot and crispy, straight out of the oven.  And yes! the wontons are baked and are just as delicious as fried ones.         
   
As always, feel free to toss in a tablespoon or so of flaxseed meal for added nutrition.

The egg rolls will fly off the plate—you won’t be able to make them fast enough! What's great about this recipe is that it could easily be doubled, tripled, quatrupled...you get the idea.  


Shaped Pork Egg Rolls

1/2 lb. ground pork
3/4 cup finely chopped cabbage
1 cup finely chopped bean sprouts
2 tbsp. finely chopped scallion
1/4 tsp. salt
1/8 tsp. black pepper
1/2 tsp. minced garlic
1 tsp. soy sauce
1/4 tsp. ginger powder
1 egg, beaten and divided
1 package wonton wrappers (about 48 count)
cooking spray
  
Preheat oven to 400 degrees F.  

Place first nine ingredients into a medium mixing bowl.  Add half of the beaten egg into the bowl and thoroughly combine.  Reserve the remaining egg.  To assemble egg roll, brush a wonton with the reserved egg and place a teaspoon of the pork filling in the center.  Cover with a second wonton.  Make a tight seal by pressing down on the wonton around the filling and pressing out air bubbles.  Use a biscuit or cookie cutter to cut shapes.  Place on a cookie sheet with egg roll bottom-site-up.  Repeat until all wontons are used.  

Coat the top of egg rolls with a layer of cooking spray.  Turn over, cooking-spray-side-down and  repeat spray. 

Bake on middle rack for 10 minutes.  Move cookie sheet to top rack and bake for an additional 3 minutes or until the top turns golden brown.  Makes about 2 dozen egg rolls.

Serve with your favorite dipping sauce.  My family’s favorite  recipe is below. It is an adaptation of a recipe my husband found in The New York Times years ago. 


Dipping Sauce (Nuoc Cham)

1 tsp. chili garlic sauce (adjust to suit your preferred level of heat)
1 clove garlic, minced  
3 tbsp. sugar
2/3 cup warm water
1 tbsp. lime juice
1 tbsp. rice wine vinegar
5 tbsp. fish sauce

Combine all ingredients, stirring to dissolve sugar.  Allow to sit for about 10 minutes before serving.      


Print Friendly and PDF
Follow FoodforFinicky on Twitter