Thursday, December 22, 2011

Tuna Fried Rice

I swear, when I gave this dish to a group of four toddlers and preschoolers for the first time, I was pleasantly surprised by the result.  Not only did ALL of them finished their serving, but 3 asked for seconds!!  If you want to introduce tuna to a child, try this first!  I believe the soy sauce is the key because it masks the taste of the tuna. Additionally, the super sweet corn adds a nice contrast to the saltiness of the dish, and all the children can taste is deliciousness.

tuna fried rice

Note:  Tuna, while nutritious, contains some amount of mercury and should be eaten in limited quantities.  This recipe uses only one 5 oz. can of tuna for about 10 half cup servings, therefore, I feel comfortable serving this once or twice a month.  The American Pregnancy Association’s web page has recommendations on portion size and frequency of tuna consumption.


Tuna Fried Rice

4 cups refrigerated cooked rice
1 5-oz. canned tuna, drained and flaked with fork
2 eggs
1 tbsp. milk
3/4 cup super sweet canned corn, drained
3 tbsp. cup finely chopped scallion (greens only)
1/4 tsp. garlic powder
1/2 tsp. salt
1/4 tsp. pepper
1 tbsp. soy sauce
olive oil

Heat a large skillet on medium heat. Coat the bottom of pan with oil.  In a small bowl, whisk milk and eggs.   Add to skillet, allow bottom of eggs to set and become lightly golden, about 2 minutes.  Flip eggs over and cook for about 15 seconds.  Remove from heat and  chop eggs using spatula.  Transfer to a plate.


To the same pan, on medium high heat, add oil to coat bottom.  Add scallion, stirring for 2 minutes.  Add rice, corn, garlic powder, salt, pepper, and soy sauce.  Stir until heated through, about 2 minutes.  Add tuna and eggs, gently stirring for another 2 minutes.  Serve.

Print Friendly and PDF
Follow FoodforFinicky on Twitter

Friday, December 9, 2011

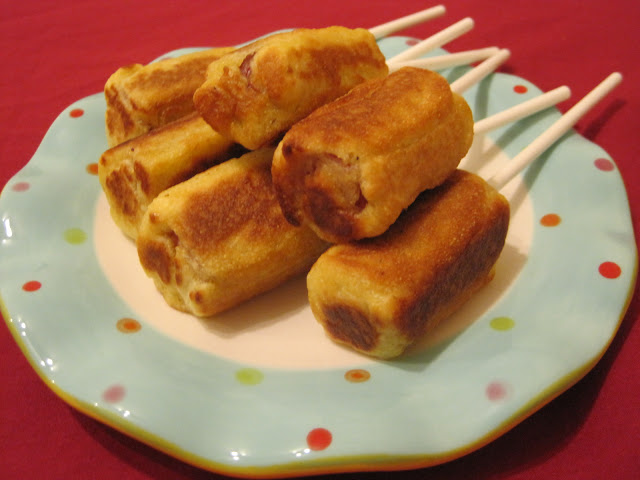
Party Unfried Mini Corn Dogs

I wanted to use the most healthy “hot dog” available to me, so for my first attempt, I used meat sticks for toddlers, the kind that comes in a glass jar in the baby food section.  Unfortunately… let’s just say that I didn’t bother to ask for taste testers for my first trial.  It was a flop!  I then opted to use turkey hot dogs which are less caloric than their counterpart.  I’m please to say that my taste testers approved of this option.
                                                                                                                
I am eager to share this recipe with you.  However, I will continue to work on it to create a no sugar version as this one uses regular sugar. I will update this post once that is accomplished. 
                                              
Note:  After a little bit of experimenting, I found that 1 1/2 tsp. of Stevia is a good substitution for the sugar in this recipe.  If you want to increase the Stevia, I suggest doing it in 1/4 tsp. increments as a little bit of it goes a long way.

unfried mini corn dogs


Party Unfried Mini Corn Dogs

3/4 cup flour
1/2 cup corn flour
1 1/2 tsp. baking powder
1/8 tsp. salt
3 tbsp. sugar
3 tbsp. golden flaxseed (optional)
1 egg
7 tbsp. milk 
8 to 10 turkey hot dogs (cut into thirds)
olive oil

Mix together the first six ingredients.  Beat in egg and milk until batter has the consistency of thick pancake.  Add additional milk, 1 tsp. at a time of batter is too thick.

Heat a medium non-stick skillet on medium heat.  Add enough oil to lightly coat bottom of skillet.  Work in small batches to allow time to flip corn dogs while cooking (no more than 6 at a time).  Dip hot dogs into batter to completely coat, using fingers for best results.  Place in skillet.  Turn each hot dog a quarter turn once the bottom has firmed up, in about 30 seconds.  Repeat this step for the other three sides to shape the corn dogs.  Allow each side to brown for an additional minute per side.


Turn over a quarter turn when bottom firms up in about 30 seconds.
Dogs shaped.  Continue to brown, then stand on end to brown ends.
Stand dogs on ends to brown.  This should only take about 15 seconds per end.  Insert popsicle sticks before plating.


Print Friendly and PDF
Follow FoodforFinicky on Twitter

Thursday, December 1, 2011

Frozen Chocolate Covered Sweet Potato Pops

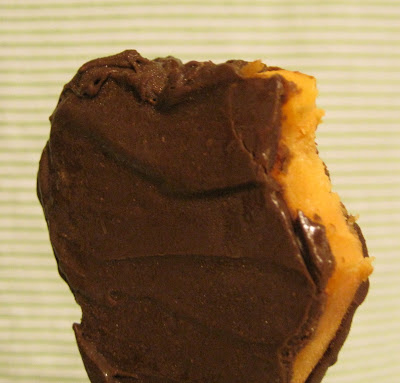
I woke up one day wanting to do something unusual with sweet potatoes that children would really enjoy.  What do children like?  Well…chocolate, lollipops, and popsicles, but the trick was how to incorporate sweet potato into this combination.  It then dawned on me that foods tend to lose their flavor when frozen.  I realized that sweet potato will lose its flavor in the freezer, and to cover it with chocolate—it was a no brainer!

chocolate covered sweet potato pop

This snack will allow you to feel less guilty about giving your child (or yourself) a sweet treat.  The only discernable taste in it is chocolate.  I felt the need to add a healthy dimension to the chocolate portion and decided that dark chocolate, with some beneficial properties, would be a good option.  Since children don’t generally like dark chocolate, I combined it with milk chocolate to balance out the flavor.  It was a big hit!!


Frozen Chocolate Covered Sweet Potato Pops

1 medium sweet potato, peeled
1/3 cup dark chocolate chips
1/3 cup milk chocolate chips
Small cookie cutter or fondant molds (1 1/4 inch or less in diameter)

Fill a medium size saucepan half full with water and bring to a boil. 

Make a thin slice along one side of potato to create a flat surface so that the potato does not roll on the cutting board.  Cut slices between 1/4 - 1/3 inch thick.  Add to boiling water.  Boil potatoes, loosely covered for 10 – 12 minutes on medium to medium high heat, until soft, but not falling apart. Taste to check for doneness; it is important that potatoes are not undercooked.  

Gently remove potatoes using a slotted spoon, rinsing quickly under cold water to cool before transferring to a flat surface.  Pat dry using paper towels.  Allow to cool completely. 

Use cookie cutters to cut out potato shapes.  Then, place on a wax paper lined cookie sheet, leaving space between each for the lollipop sticks.  Insert a stick into each using one hand to apply gentle pressure on the top and sides of the potato to prevent splitting.  If the potato splits, gently press it back into shape around the stick and freeze for 1 hour.

Combine chocolates in a microwave safe bowl and microwave for 30 seconds.  Stir.  Return to microwave for another 10 seconds, stir.  Repeat until chocolate is completely melted.  Remove potato pops from freezer.  Coat the pops with chocolate using a small rubber spatula.  Place back on wax paper.  Refreeze pops, for at least 6 hours—the longer, the better.  The potatoes need time to get completely frozen.

Note:  When using regular size cookie cutters (2 inch to 2 ¼ inch diameter) the wait time in the freezer for the first freeze increases to 2 hours and the second freeze is at least 8 hours (overnight is best).


Print Friendly and PDF
Follow FoodforFinicky on Twitter

Wednesday, November 23, 2011

Crumbly Crusted Chicken Pot Pie

I find that, with children, the same food presented two different ways can lead to two different results.  Preschoolers are more apt to dig into a bowl of food rather than a slice of pie.  For that reason, I serve all of my pies bowl style.  The crust is crumbled into the filling and makes it even yummier. In this recipe, sweet potato adds extra nutritional value to the dish and can be used in addition to or in lieu of the white ones. 

When baking the pie crust, a few small pieces may be cut out using mini cookie cutters or fondant molds and can be added as decorative finish as seen in the picture below.  The tiny cutouts need about 6 minutes of baking, turning over after 4 minutes.

crumbly crusted chicken pot pie


Crumbly Crusted Chicken Pot Pie

2 Refrigerator pie shells
2 15-oz can low sodium chicken broth, divided
12 oz. boneless chicken breast, cut to 1/4 inch dice
1 large clove garlic, minced
3/4 cup carrots, diced to 1/4 inch cubes
1 1/4 cup sweet potato, diced to 1/4 inch cubes OR
3/4 cup each of sweet and regular potato, diced to 1/4 inch cubes   
1/2 cup finely diced onion
2/3 cup frozen or canned peas
2 tsp. (2 packs) sodium free chicken bouillon
1/8 tsp. dried thyme
1/4 tsp. ground oregano
1/4 tsp. garlic powder
1 tsp. salt
1/2 tsp. black pepper
1 tbsp. golden flaxseed
1/2 tsp. soy sauce
2 tsp. olive oil
2 tbsp. cornstarch

Preheat oven.  Unroll pie shells on a cookie sheet and bake according to package instructions.   Remove and cool on rack.  Reserve 1/2 cup of chicken broth in a small bowl. Set aside.

Heat a large pot on medium, add oil.  Stir in onion, minced garlic, sweet potato, and carrots.  Cover and allow to sweat for 5 minutes, stirring twice.  Increase heat to medium high and add white potato (if using), chicken bouillon, thyme, oregano, garlic powder, salt, pepper, flaxseed, soy sauce, and the unreserved broth.  Loosely cover and allow to come to a boil.  Reduce heat and simmer for 15 minutes.

Stir in chicken and peas.  Increase heat to medium high and allow come to a boil.  Whisk together cornstarch and reserved chicken broth and stir into pot until slightly thickened, about 1 minute.  Remove from heat.  When ready to serve, crumble a handful of crust and stir into pie filling.

Print Friendly and PDF
Follow FoodforFinicky on Twitter

Monday, November 14, 2011

Cheesy Spinach Layered Biscuits

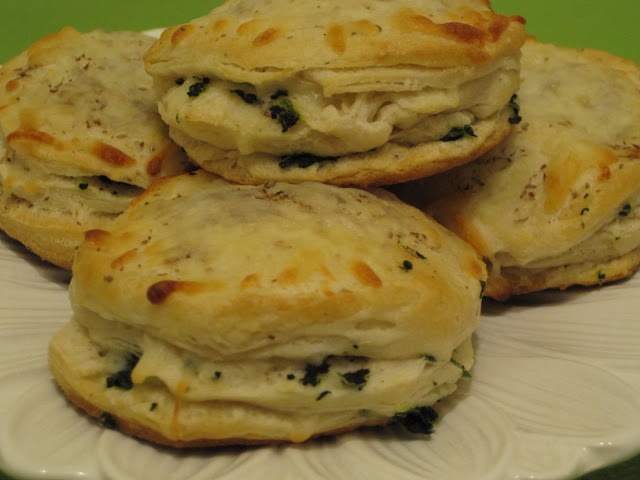
This recipe transforms ordinary store bought refrigerated biscuits into something a little more special for kids.  With the addition of spinach and flaxseeds for nutrients and cheese for extra yummy factor, these biscuits are a great snack or side.

I came up with this recipe a number of years ago to get spinach into my family and daycare children’s diet.  It is still one our sneaky food favorites today.

cheesy spinach layered biscuits


Cheesy Spinach Layered Biscuits

1 can flaky refrigerated biscuits
1 1/4 cup frozen cut spinach leaves
1 1/4 cup shredded pizza cheese
2 tsp. ground flaxseed meal

Preheat oven to 350 degrees.

Place frozen spinach in a food processor and pulse until finely ground.  Place in a bowl and microwave for 20 seconds.  Wrap in a clean, dry towel or layers of paper towels and squeeze dry.  Separate and fluff spinach using fingertips.

Separate biscuit into three layers.
Reassembled biscuit.

Separate each biscuit into three layers.  Sprinkle flaxseed on all.  Add a thin coating of spinach to two layers.  Sprinkle cheese on all layers.  Stack the spinach layers on top of each other.  Top with the third layer (without the spinach).  Repeat these steps for all 8 biscuits.

Place about 2 inches apart on an ungreased cookie sheet and bake for 15 – 17 minutes.

Print Friendly and PDF
Follow FoodforFinicky on Twitter

Thursday, November 10, 2011

Fish in a Bowl

Kids I know who don't eat fish like this dish.  Why?  Because it looks unassuming so they are not afraid to try it.  Once they have taken a bite, they realize that it really does taste good.  Every child who eats rice has eaten this dish for me.  Using a mild white fish allows it to blend into the rice, introducing children to the flavor of fish without it being overpowering.  Increase the amount of fish as the child acquires a taste for it.

fish and rice,rice a yellow with white polka dots

When it comes to cooking rice, in my opinion, the best way is to use a rice cooker.  It’s foolproof!  But, there were times that I wanted to challenge myself by making it from scratch.  It has always proven to be a gamble, often times with disastrous results…too crunchy, too dry, too wet, or too sticky.  I finally figured the method that worked best for me.  The trick is to use a heavy bottom pan with a tight fitting lid and just the right amount of heat.


Fish in a Bowl

 4 oz. haddock, pat dried
1/8 cup flour
1/4 tsp. salt
1/4 tsp. pepper
1/4 tsp. garlic powder
1/4 tsp. onion powder
1 cup uncooked rice
2 cups water
1 tsp. olive oil
1 generous tbsp. margarine
Salt to taste

Bring water to a hard boil.  Turn heat down to medium low to low range.  Add rice and stir for 30 seconds.  Cover and simmer for 20 minutes.  DO NOT OPEN LID!  Turn off heat, allow to sit for 5 minutes, and fluff with a fork. 

Combine flour, 1/4 tsp. salt, pepper, garlic and onion powder on a plate.  Dredge fish in flour mixture and pat off excess.  Heat a small frying pan on medium high heat and add olive oil.  Add fish and sear till golden brown, about 3 minutes on each side depending on thickness. 

Flake fish into fine pieces using two forks.  Stir into rice.  Season with margarine and salt to taste.

Print Friendly and PDF
Follow FoodforFinicky on Twitter

Thursday, November 3, 2011

Yummy Black Bean Brownie

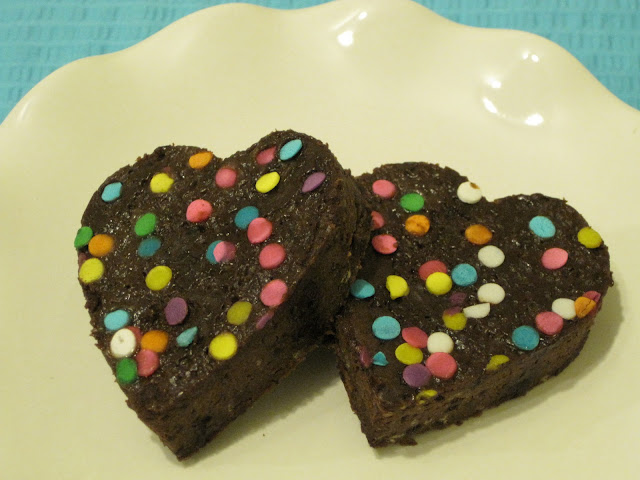
My sister introduced me to the black bean brownie during one of her visits from Colorado.  It was delicious, but more suited for the adult taste palate, so I played around with the recipe until I achieved the texture and flavor more suited for children.  

Yummy Black Bean Brownie

The recipe below has both regular and low sugar options.  My sweetener of choice is White Stevia Powder.  To make a low sugar brownie, I use a combination of sugar and Stevia.

The first time I served this to a test group of children, four out of four ate it and three asked for more.  My teenage son who won’t eat beans, except for green beans, asks for this brownie!

Yummy Black Bean Brownie

1 can black beans, rinsed and drained
3 eggs
3 tbsp. vegetable oil
1/4 cup cocoa powder
2/3 cup sugar or
1/4 cup sugar + 1 tsp. Stevia powder
1/4 cup flour
1 tsp. vanilla extract
1/3 cup ripe mashed banana
1/4 cup chocolate chips
1 tbsp. decorative sprinkles
Pinch of salt

Preheat oven to 350 degrees F.  Grease 8” x 8” baking pan.

Combine all ingredients except for chocolate chips and sprinkles in a food processor until smooth.  Pour 2/3 of batter into pan, sprinkle on chocolate chips, and cover chips with remaining 1/3 of batter.  Bake for 18 minutes, remove from oven, and add decorative sprinkles on top.  Bake for an additional 10 minutes or until a toothpick comes out clean when inserted.  Cool completely, best when allowed to sit a few hours before serving.  Cut into shapes using a cookie cutter, optional.  Store refrigerated.

Note:
To make this recipe even lighter, replace eggs with 3/4 cup egg substitute.  Increase baking time 2-4 minutes.

Print Friendly and PDF
Follow FoodforFinicky on Twitter

Sunday, October 23, 2011

Chicken and Navy Bean Nuggets

These look and taste like ordinary nuggets you would find in the frozen food section, only much healthier.  The navy beans provide fiber and additional protein.  This is a must try!  It's kid tested and approved!

chicken and navy bean nuggets


Chicken and Navy Bean Nuggets

Chicken Filling:
24 oz. chicken breast
cup canned navy beans, rinsed and drained
1/4 tsp. garlic powder 
1/4 tsp. onion powder
1/4 tsp. salt
1/4 tsp. pepper

Crumb Coating:
cup bread crumbs
1/2 tsp. salt
1/2 tsp. pepper
1/2 tsp. paprika
1/2 tsp. garlic powder

Egg Wash:
3 eggs + 2 tbsp. water, beaten or
1/2 cup egg substitute

Olive oil for browning

Combine bread crumbs and seasonings in a bowl, set aside. Pour egg wash in separate bowl, set aside.

Cube chicken.  Place chicken, beans and spices in food processor.  Puree until well blended and smooth.  Mixture will be sticky.  Grease hands and shape chicken mixture into ½ inch thick and 1½ inch wide patties.  Dip each in egg wash, then in bread crumbs mixture. 

Preheat a skillet on medium heat.  Add enough olive oil to coat bottom of pan.  Cook chicken patties until golden brown, about 3 minutes on each side.  Add more oil if needed to prevent crust from burning.  Serve with a favorite dipping sauce.  Keeps well frozen.  Makes about 24 nuggets.


Print Friendly and PDF
Follow FoodforFinicky on Twitter